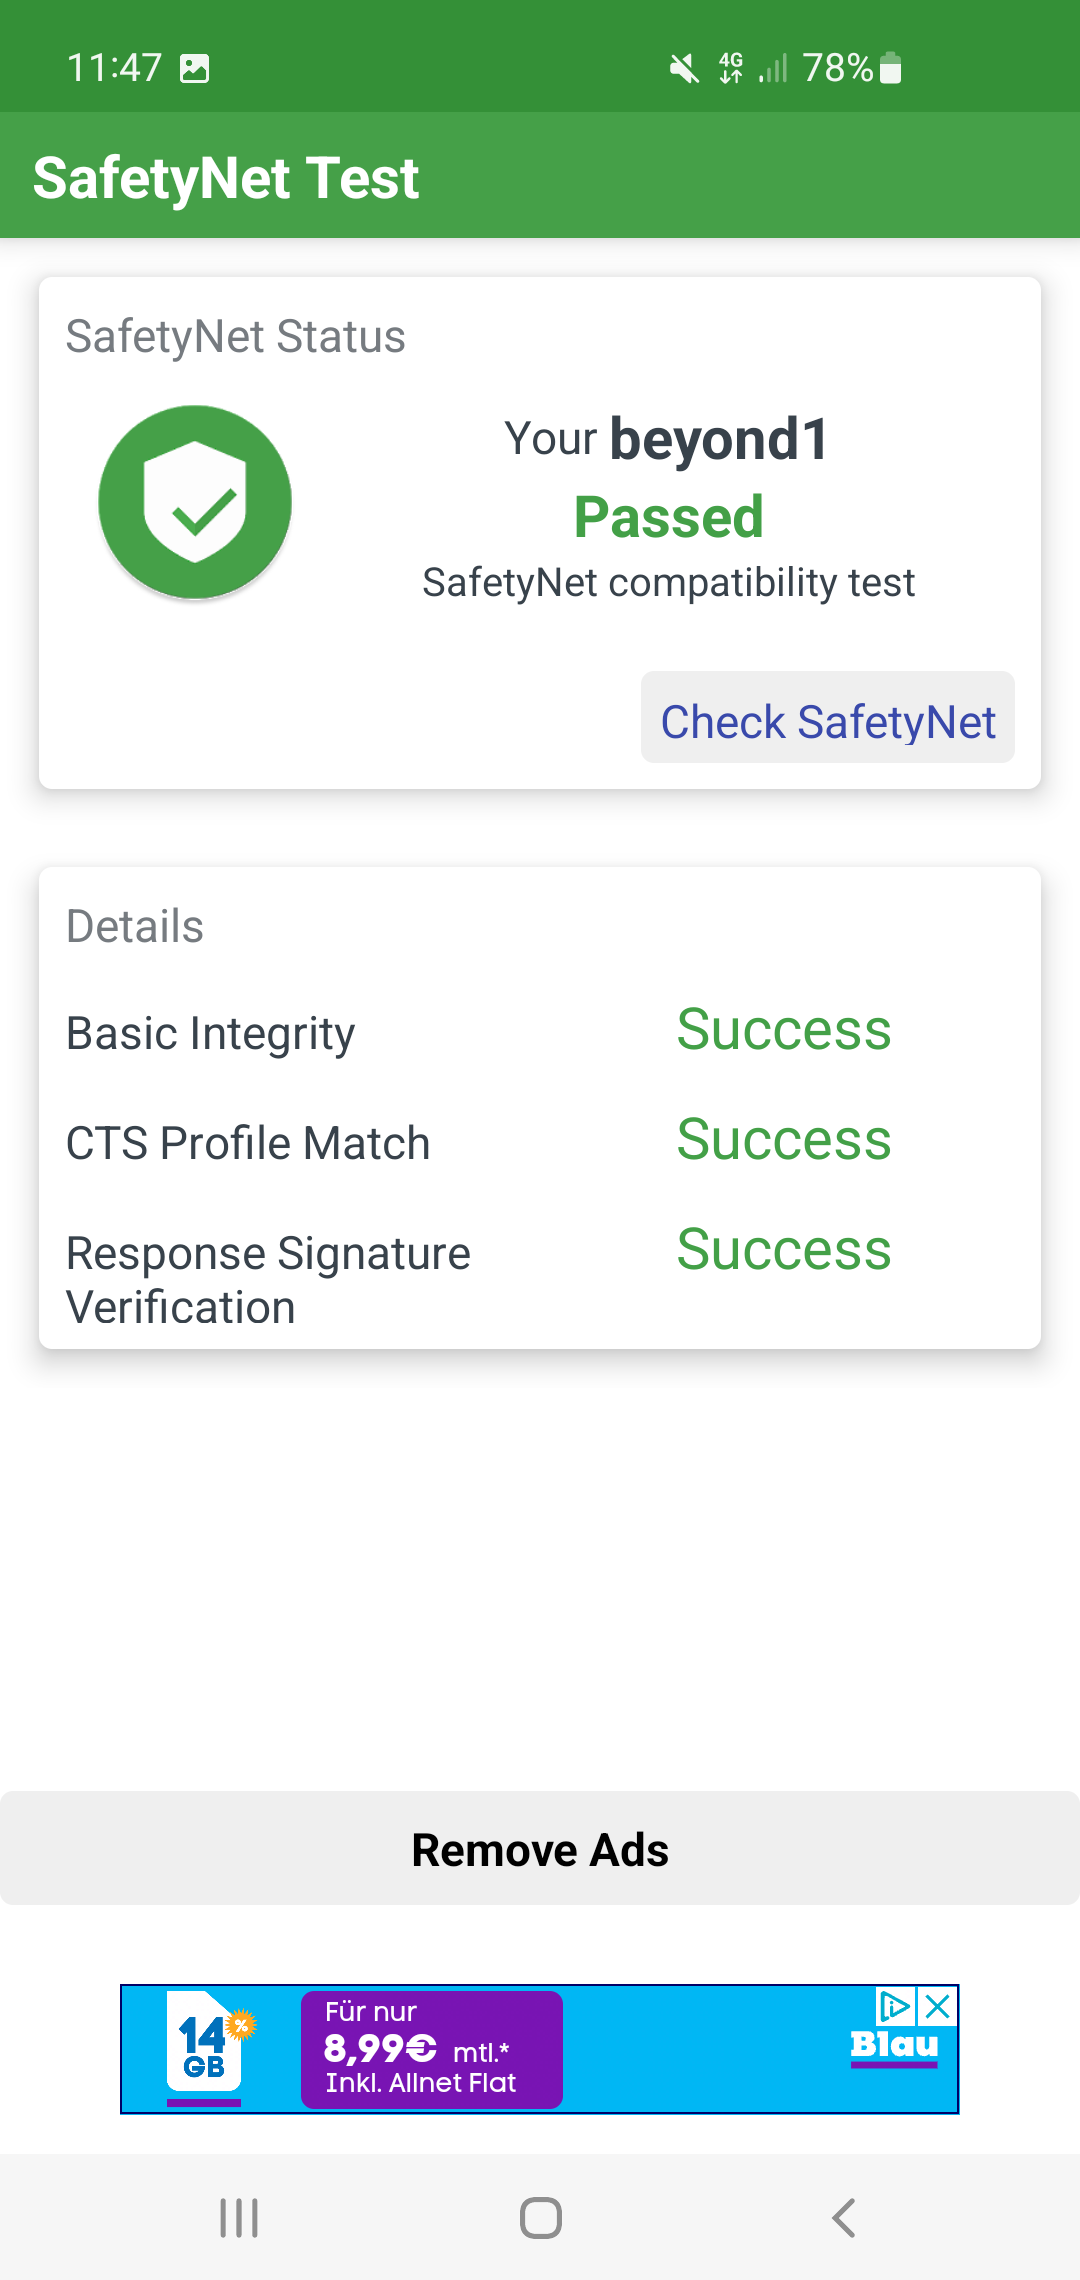
UPDATE – DECEMBER 23, 2021 – UNIVERSAL SAFETYNET FIX BY kdrag0n (Zygisk and Riru versions)
kdrag0n has released new versions of the Universal Safetynet Fix and there are both Riru and Zygisk versions. So what to choose?
Well, for those of you using Magisk Canary, go with the Zygisk Version.
For those using the stable Magisk, go with the Riru version. Keep in mind that if you go with the Riru version of this universal SafetyNet fix, you also need to install the Riru module through Magisk Manager.
Here are the links to the two versions –
Do note that Android versions 7–12 are supported, including OEM skins such as Samsung One UI and MIUI.
UPDATE – SEPTEMBER 13, 2021 – UPDATED UNIVERSAL SAFETYNET FIX BY kdrag0n
So, kdrag0n has released the latest version of the Universal SafetyNet Fix and the biggest highlight of the new version is that the SafetyNet failed issue of September is now fixed with this new update. So, the steps remain the same as before –
- Download this Magisk Module (For Android 7.0/7.1 to Android 12 Beta 4 and future versions) – SAFETYNET-FIX-v2.1.1
- Open Magisk and go to the Modules tab
- Install the Magisk Module that you downloaded
- Reboot your phone, and that’s it.
CHANGELOG OF VERSION 2.1.1 –
- Fixed under-display fingerprint on OnePlus devices (@osm0sis)
Older versions –
UPDATE – SEPTEMBER 2, 2021 – NEW FIX FOR SAFETYNET FAILED ISSUE
So recently, for some reason, SafetyNet has started failing even after installing the below-mentioned Universal Fix by kdrag0n. Well, thanks to TeamFiles on Telegram., we have another fix now that works for this new issue. This fix requires you to first download a few files. Here are the ones you need to download and keep on your phone before starting with the steps –
- Riru – Latest Release
- LSPosed – Latest Release
- XPrivacyLua – Download the Apk
You can also download a Zip file that has all these three files included in it. Here is the link to that.
Now, before starting, make sure you backup everything as this fix has not been tested for all the devices, so it may cause some issues in your phone. Also, make sure the latest Stable version of Magisk is there on your phone. We won’t be responsible for any damage happening to your phone.
Here are the steps –
- First, go to Magisk and install the Riru Module. Once the installation succeeds, come back to the modules page. Do not reboot yet!
- Next, install the LSPosed Module. Once that installs successfully, reboot your phone. This is important! Do not reboot in the first step.
- Once the phone reboots, you will see a new LSPosed app installed on your phone.
- Now, you need to install the third apk file that you downloaded. Once that installs, go to the LSPosed app and go to Modules.
- There, choose the XPrivacyLua and make sure that you “Enable Module.” Initially, make sure “System Framework” and “Settings Storage” options are checked.
- Now, go to the top right and tap on the three-dot menu. Select “Hide” and uncheck the “System Apps.”
- So now, you need to scroll down and find Google Play Services among all the apps. Just Check that. Now Reboot your phone again.
- Now when your phone reboots, you need to go back to the LSPosed app and ensure that there are three options checked in the XPrivacyLua module. There are – “System Framework,” “Settings Storage,” and “Google Play Services.”
- Once that is all right, close LSPosed, and there will be another app installed on your phone named “XPrivacyLua.” Open that. Click “I Agree.”
- Here, find Google Play Services and tap on that. Now, you need to check only one option there. And that’s “Use Tracking.” That should be the last option there.
- Finally, Clear all the data and cache of Google Play Store as well as Google Play Services. Also, Hide Magisk and change its name.
- And now do a final reboot!
And that’s it! If everything goes well, you will no longer have the SafetyNet Failed Issue on your phone, and the Play Store will show Device is Certified. If Banking apps are not working even after fixing the SafetyNet with this method, then you need to check “Use Tracking” for those apps in “XPrivacyLua.” Just like what we did with Play Services. And then the same steps, i.e., clear data and reboot. For a better understanding, here is the full video tutorial by Munchy –
UPDATE – JULY 4, 2021 – UNIVERSAL FIX FOR SAFETYNET (ALL THANKS TO kdrag0n)
kdrag0n has shared a Universal Fix for Google SafetyNet on Android devices with hardware attestation and unlocked bootloaders. You can now install a Magisk Module that will fix the ctsProfile Failed issue. On the official Github page, kdrag0n has mentioned that –
This Fix defeats both hardware attestation and the new CTS profile updates, without any changes to device or model names, as long as you can pass basic attestation (i.e. fingerprints). No device-specific features (such as the Pixel-exclusive Google Assistant design) will be lost. MagiskHide is required if the device is rooted. Android versions 8–11 are supported. Heavy OEM skins are not officially supported, but they may work depending on your luck and the particular ROM in question.
Anyways, here are the steps –
- Download this Magisk Module (For Android 8-11) – SAFETYNET-FIX-v1.2.0
- Open Magisk and go to the Modules tab
- Install the Magisk Module that you downloaded
- Reboot your phone, and that’s it.
v1.2.0 Changelog:
- Added support for Android 12 Beta 2
- Fixed bootloop after major Android updates
PREVIOUS VERSIONS OF THE FIX –
NOTE – DONT INSTALL MODULE FOR Android 11 on Android 10 and vice versa as it will result in BOOTLOOP !!!
- SAFETYNET-FIX-v1.1.1(ANDROID 8-11)
- SAFETYNET-FIX-v1.1.0 (ANDROID 8 – 11)
- SAFETYNET-FIX-v1.0.2 (ANDROID 11)
- SAFETYNET-FIX-v1.0.2 (ANDROID 10)
- SAFETYNET-FIX-v1.0.0 (ANDROID 11)
UPDATE – HERE IS ANOTHER METHOD THAT WILL HOPEFULLY HELP YOU FIX THE CTS PROFILE FALSE ISSUE
NOTE – TRY THESE STEPS ON YOUR OWN RISK. WE WON’T BE RESPONSIBLE IF ANYTHING GOES WRONG.
Here are the steps –
- First, go to the Google Play Store & download “Termux,” an Android terminal emulator and Linux environment app.
- Next, open Magisk Manager & from the left side menu, select the “Downloads” option.
- There, you need to Install two Magisk Modules – Busybox for Android NDK & MagiskHide Props Config.
- You can either Install one Module & then reboot and then Install the other, or Install One, go back, install the second, and then reboot. Both will work.
- Once the phone reboots, we need to do one final thing, which is the most important step. Before moving to the next step, check if both the modules are shown as installed or not in Magisk Manager.
- Open the Termux app & then type “su” and press Enter. This will grant Superuser Rights to the app.
- Next, type “props” & press Enter. You will see a lot of options & numbers in front of them to choose from.
- You need to choose the option that says “Edit Device Fingerprint.” It should be the Number “1,” but double-check it on your device.
- Enter that Number & press Enter.
- Again, you’ll see some options & from there, choose the one that says “Pick a certified fingerprint.” This time, instead of numbers, you will see letters in front of each option like “f,” “v,” “s,” “b,” etc. Enter the letter in front of the option (Pick a Certified Fingerprint) & press Enter.
- Now, you’ll see a long list of various Smartphone companies, so from here, you need to choose your phone’s company. For Example, if your phone is the Asus Zenfone Max Pro M1, choose “Asus.” Here also, you need to type the number in front of the company name & then press Enter.
- Now, it’ll show you various devices from that company. If your device is there on the list, you’re good to go. Otherwise, you’re not lucky, so you will have to wait for some other method.
- Select the number in front of your Phone’s name & then press Enter.
- Finally, it will ask if you want to continue. If you have followed everything above & selected the right options, write “y” & press Enter.
- Finally, press “y” to reboot your device & press Enter. Now, your phone will reboot.
After all these steps, you will see that in the Magisk Manager, it no longer says “false” in front of the ctsProfile option. Also, in the play store, it’ll say “Device in Certified.” Hopefully, now you will also be able to use Payment apps like Google Pay on your device (Hopefully).
Thanks to Crazy Customization (YouTube) for the video tutorial.
UPDATE: 2020 – IN MARCH 2020, GOOGLE MADE SOME CHANGES WHICH RESULTED IN MAGISK, NOT ABLE TO PASS SAFETYNET. HERE IS A WORKAROUND FOR THAT TO FIX THE CTS PROFILE FALSE ERROR (SAFETYNET FAILED).
We will use Xposed Framework for the Workaround, but you need to have your device rooted via Magisk and have the Magisk Manager installed on your phone since we need the Magisk Modules. Now, there is no way to know if Xposed Framework will be working on all the devices, so this means there are chances of it not working on your device.
First of all, here are all the files that you need to download on your device –
- LATEST MAGISK
- HIDDENCORE XPOSED MODULE
- MAGISK RIRU-CORE MODULE ZIP FILE
- EDEXPOSED SANDHOOK OR YAHFA VERSION (Whichever works for you. We suggest trying Yahfa first).
- EdXPOSED MANAGER APK FILE
- RIRU MANAGER APK
Table of Contents
HERE ARE THE STEPS TO FIX MAGISK CTS PROFILE FALSE ERROR WITH THE NEW METHOD
- First, Install Riru Manager. In case you get the Unknown Sources error, enable ‘Allow from this source’ and Install it.
- Once you install it, go to Magisk Manager, then, from the left side menu, go to the Modules section. Tap on the Plus Button.
- Now, if you don’t have the ‘Show Internal Storage’ option enabled in File Manager, then tap on the three dots on the top right corner and select it. In case it is already enabled, you will see the ‘Hide Internal Storage’ option in its place. So, you don’t need to do anything.
- Navigate to the folder in the internal storage where you have all the downloaded files and then select the ‘MAGISK RIRU-CORE’ ZIP file. Once installed, Reboot the phone. (Check the Modules section in the Magisk Manager if the module has been installed properly. You will see a checkmark if it is installed successfully).
- In the App Drawer, you will now see a new app called ‘Riru.’ Open it, and if it says ‘Everything Looks Fine,’ then you’re all set to follow the next steps. If you get any error, try installing Riru Module again.
- Now, once again, go to the Magisk Manager > Modules and then press the Plus button. Now, we need to install the ‘EdExposed Module,’ and as mentioned above, there are two versions to choose from. You have to try and see which one works for your device. We will recommend starting with the ‘Yahfa’ version first. Once again, once installed, reboot the phone. After reboot, once again confirm if the module is installed properly.
- Now, go to the File Manager and then install the ‘EdExposed Manager’ via the APK file. You will see the App in the App Drawer.
- Open it to see if there are any errors or not. If there are any, then this means the ‘Yahfa’ version didn’t work. So, in that case, go to the Module section, remove the Yahfa version, reboot the phone, and then install the ‘Sandhook’ version.
- Finally, install the ‘HiddenCore’ Xposed Module via its APK file. Now, go to ‘EdExposed Manager,’ swipe from the left side, select the ‘Modules’ option, then enable the ‘HiddenCore’ Module. Now, reboot your phone.
- After Reboot, you should check if the ‘HiddenCore’ module has been enabled successfully in the EdExposed Manager.
Well, that’s it! Now, go to Magisk Manager, tap to start the SafetyNet Check, and you will now see that the ‘ctsProfile’ shows as True! This means we successfully did the SafetyNet Bypass.
NOTE THAT IF THIS METHOD ALSO DOESN’T WORK, THEN WE WILL HAVE TO WAIT FOR THE DEVELOPERS TO FIND ANOTHER FIX FOR THIS.
Props to ‘Munchy‘ to share this method on his YouTube Channel.
Before starting with the steps to fix the Magisk CTS Profile False/Mismatch Errors, let’s first understand what is ‘SafetyNet.’ We all know that rooting our Android phones give us a lot of freedom. We can do some great things with a rooted smartphone-like installing a custom ROM, a custom Kernel, overclocking the processor, etc.
But, if you have a device with which you use Google’s Android Pay, then it won’t work if you root your phone. SafetyNet is a thing that Google uses to detect whether your Android smartphone is rooted or not, and if it detects that you have a rooted phone, certain apps can block you from accessing them. We have seen this with the Netflix app that users cannot even find the app to download from the Play Store if their devices are rooted.
CHECK OUT – How To Hide Home Button on Galaxy S8’s Always On Display
Magisk, as most of you might know, is a Universal Systemless Interface to create an altered mask of the system without changing the system itself. (Thanks, XDA). With Magisk and Systemless root, we can skip most of the SafetyNet tests, revert but the thing is that Google’s Compatibility Test Suite (CTS) is still a problem.
So, you might get the ‘Magisk SafetyNet CTS Profile Mismatch Error’ even if you have the Magisk installed on your android phone. Assuming that you have already installed the Magisk, let’s start with the steps to fix this error.
TIP – You can check your SafetyNet status from the Magisk Manager. You will find an option that says ‘Tap to start SafetyNet Check.’ Tap on that, and it will show you the status.
STEPS TO FIX THE CTS PROFILE MISMATCH ERRORS – FIX CTS PROFILE MATCH FALSE
1. WHY NOT USE MAGISKSU?
So, the thing is that if you have rooted your smartphone and it is having any other root manager than the MagiskSU, then the chances are that it doesn’t hide from Google’s SafetyNet, and you get the error. SuperSU, the most popular root manager app, is on almost every rooted device so, if you want to get rid of the CTS error, make sure that you are using MagiskSU and not SuperSU.
- If you have the Xposed Installer installed, then uninstall it. No need to worry about all the modules you were using. You can install the systemless version of the Xposed using Magisk. To uninstall Xposed, go to Framework > Uninstaller and choose the ‘Uninstall’ option. After the process completes, reboot your device by tapping on the ‘Reboot’ option.
- This step is a bit trickier, and if you have made any changes in the system after rooting your phone, you need to revert them. For Example, let’s suppose you removed the bloatware apps via Titanium Backup. So, you need to install them again. Or, let’s assume that you used AdAway to remove ads. So, you need to remove that also. And we all know what’s the best way to revert all the changes – Flashing the Stock System Image of your phone.
- Now, you need to Unroot via the option in SuperSU and then restore the Stock Boot Image of your phone. For that, Go to the SuperSU app and then settings. There, you will find an option called ‘ Full Root.’ Just tap on that and tap ‘Continue.’ Now, it will ask you if you want to restore the stock boot image. Here, make sure that you tap on the ‘Yes’ option. Now, for installing Magisk, you need TWRP installed, so if you already have TWRP, you need to tap on ‘No’ when SuperSU asks if you want to restore the stock recovery image.
- Now, you need to install the Magisk zip. For this, head to the Magisk Manager app and go to the Install section. Here, you will find an option named ‘Download.’ Tap on that, and once downloaded, boot into recovery. Once you are in TWRP, tap on ‘Install’ and select the Magisk ZIP file from the Magisk Manager folder. To flash the ZIP file, slide the button to the right and when finished, tap on ‘Reboot System.’
- Now, go to the Magisk Manager app, and go to settings. Here, make sure to enable Magisk Hide, BusyBox, and Systemless hosts options. Lastly, clear the data of the Play Store by going to Settings > Apps > Play Store > Manage Space > Clear Data.
Now, head to the Magisk Manager app and go to Magisk Hide. Make sure that this option is enabled, and it will be used to hide additional apps like Google Play Store and Google Services Framework and other apps that you think are having issues with SafetyNet.
READ: How To Save Game Data On Android With Helium
2. WHAT ABOUT TRYING unSU?
If you cannot fix the CTS Profile Mismatch error even after doing everything mentioned above, you can try unSU. We have to use this because, i.e., even after doing the ‘Full Unroot’ via the SuperSU, not all the data of the SuperSU is removed. The developer osm0sis has created a flashable zip that you can download and flash via TWRP. The flashing procedure is the same as you flashed the MagiskSU ZIP.
DOWNLOAD THE unSU ZIP FILE HERE
3. IS USB DEBUGGING ON? TURN IT OFF!
We also don’t know why but the CTS Profile Mismatch error can occur even with Magisk installed if you have turned on the ‘USB Debugging’ Option. So, you need to head to the Settings? Developer Options and then turn off the ‘USB Debugging.’ Lastly, do a reboot and check if the issue has been fixed or not.
4. SET SELinux BACK TO ‘ENFORCING’ MODE
This is a pretty simple step. So, back in time, if you ever changed the SELinux mode to ‘Permissive,’ you need to revert it to ‘Enforcing,’ i.e., the default mode. So, open the same app via which you change the SETLinux Mode to Permissive and change the mode back to ‘Enforcing.’ Now, you need to reboot the phone. You can find the apps to do so on XDA easily.
READ: [SOLVED] LG G4 Won’t Turn On or Boot Up? Here’s How To Fix
5. TRY A CUSTOM KERNEL
Having a custom ROM? Well, then you can try installing a custom Kernel. Why are we saying this? The CTS is used by Google to verify that the device and its firmware meet the certification standards. A phone with custom ROM won’t pass this test. But, there is still away. You need to install a custom Kernel known as the ‘Franco Kernel,’ and to install this, you need to buy an app called ‘Franko Kernel Updater’ or ‘FKU.’ Once you have installed it, open it and then tap on ‘Download’ option. Don’t wanna spend money? Well, head to XDA, and you can find the best ‘Franco Kernel’ ZIP file for your smartphone for free.
The Franco Kernel helps so that the apps that use SafetyNet check the Basic Integrity don’t get any error.
6. ENABLE MAGISK CORE ONLY MODE
This is probably the best thing to do if all the things mentioned above aren’t working. See, when you head over to the settings of Magisk Manager, you will see an option that says ‘Magisk Core Only Mode’ under the ‘Magisk’ options. Many users have reported that turning this particular option ON fixes the magisk CTS Profile false error. Google has already updated its SafetyNet to check if there is Magisk on a particular device or not. So, enabling the Core Only Mode helps a lot in this case.
So, what this option does? Well, enabling Masigk Core Only Mode means that all the Magisk Modules currently active are disabled, and so, the only thing your phone has is the Superuser from Magisk and the root access. This step helps because sometimes, certain Magisk modules cause issues with the SafetyNet test. And yes, make sure to reboot once you enabled the Magisk Core only mode.
7. SOME USERS FIXED IT LIKE THIS
Many users have recommended some more ways to fix the CTS Profile Mismatch error on their device. First, you need to go into the Magisk Settings, and there, check if the ‘Magisk Hide’ option is turned on or not. If it is turned on, then turn it OFF and again turn it ON. Check if the error is there or not. If it is, turn off the Magisk Hide option, reboot the phone, open Magisk Settings, and turn On the Magisk Hide again.
If this too doesn’t fix it, then there is one more method suggested by some users who faced this problem. In the Magisk Settings, you will find two options – ‘Systemless Hosts’ and ‘Enable Busybox.’ Disabling these two options may also help in fixing the CTS Profile False error.
8. WELL, YOU HAVE TO DO IT NOW!
This is a step that no one would like to take if the CTS Profile False issue occurs. Well, if nothing works, then the only way you have left to fix that error is to install the stock ROM again, install the custom recovery again, then flash the Magisk ZIP file to gain the root access and check if the issue persists now or not. If you are lucky, the issue will be gone completely.
If you have a Xiaomi phone with a custom ROM installed, you can use this Magisk Module to pass the CTS test.
CONCLUSION
This was a detailed guide about fixing the CTS Profile Mismatch Error or Magisk Basic integrity False error even with Magisk installed. If the steps mentioned above don’t work, you need to start from scratch, i.e., flash Stock ROM, install TWRP, flash Magisk ZIP and do the same thing again. Did the steps work for you? Do let us know via the comments section.
What is CTS profile mismatch?
CTS means Compatibility Test Suite & CTS Profile Mismatch is an error that causes SafetyNet check to fail, even if you have Magisk on your device.
What is the SafetyNet Check?
Google Developed SafetyNet & it is an API (Application Programming Interface) that is used to detect if a certain device is in a good state or not.
How Do I Fix How do I fix Magisk SafetyNet?
1. Use MagiskSu2. Try unSU3. Turn OFF USB Debugging4. Set Selinux Back to Enforcing5. Try a Custom Kernel
How do I Enable Magisk Hide?
Open Magisk Manager App, then swipe from the left & select Magisk Hide. Now, you can turn on and off it for certain apps.